Running packet.net images in qemu
• linux
For the past months, I have been working on adding Taskcluster support for packet.net cloud provider. The reason for that is to get faster Firefox for Android CI tests. Tests showed that jobs run up to 4x faster on bare metal machines than EC2.
I set up 25 machines to run a small subset of the production tasks, and so far results are excellent. The problem is that those machines are up 24/7 and there is no dynamic provisioning. If we need more machines, I have to manually change the terraform script to scale it up. We need a smart way to do that. We are going to build something similar as aws-provisioner. However, we need a custom packet.net image to speed up instance startup.
The problem is that if you can’t ssh into the machine, there is no way to get access to it to see what’s wrong. In this post,l I am going to show how you can run a packet image locally with qemu.
You can find documentation about creating custom packet images here and here.
Let’s create a sample image for the post. After you clone the packet-images repo, run:
$ ./tools/build.sh -d ubuntu_14_04 -p t1.small.x86 -a x86_64 -b ubuntu_14_04-t1.small.x86-dev
This creates the image.tar.gz file, which is your packet image.
The goal of this post is not to guide you on creating your custom image; you can refer
to the documentation linked above for this. The goal here is, once you have your
image, how you can run it locally with qemu.
The first step is to create a qemu disk to install the image into it:
$ qemu-img create -f raw linux.img 10G
This command creates a raw qemu image. We now need to create a disk partition:
$ cfdisk linux.img
Select dos for the partition table, create a single primary partition and
make it bootable. We now need to create a loop device to handle our image:
$ sudo losetup -Pf linux.img
The -f option looks for the first free loop device for attachment to the image file.
The -P option instructs losetup to read the partition table and create a loop
device for each partition found; this avoids we having to play with disk
offsets. Now let’s find our loop device:
$ sudo losetup -l
NAME        SIZELIMIT OFFSET AUTOCLEAR RO BACK-FILE                                         DIO LOG-SEC
/dev/loop1          0      0         1  1 /var/lib/snapd/snaps/gnome-calculator_260.snap      0     512
/dev/loop8          0      0         1  1 /var/lib/snapd/snaps/gtk-common-themes_818.snap     0     512
/dev/loop6          0      0         1  1 /var/lib/snapd/snaps/core_5662.snap                 0     512
/dev/loop4          0      0         1  1 /var/lib/snapd/snaps/gtk-common-themes_701.snap     0     512
/dev/loop11         0      0         1  1 /var/lib/snapd/snaps/gnome-characters_139.snap      0     512
/dev/loop2          0      0         1  1 /var/lib/snapd/snaps/gnome-calculator_238.snap      0     512
/dev/loop0          0      0         1  1 /var/lib/snapd/snaps/gnome-logs_45.snap             0     512
/dev/loop9          0      0         1  1 /var/lib/snapd/snaps/core_6034.snap                 0     512
/dev/loop7          0      0         1  1 /var/lib/snapd/snaps/gnome-characters_124.snap      0     512
/dev/loop5          0      0         1  1 /var/lib/snapd/snaps/gnome-3-26-1604_70.snap        0     512
/dev/loop12         0      0         0  0 /home/walac/work/packet-images/linux.img            0     512
/dev/loop3          0      0         1  1 /var/lib/snapd/snaps/gnome-system-monitor_57.snap   0     512
/dev/loop10         0      0         1  1 /var/lib/snapd/snaps/gnome-3-26-1604_74.snap        0     512
We see that our loop device is /dev/loop12. If we look in the /dev directory:
$ ls -l /dev/loop12*
brw-rw---- 1 root   7, 12 Dec 17 10:39 /dev/loop12
brw-rw---- 1 root 259,  0 Dec 17 10:39 /dev/loop12p1
We see that, thanks to the -P option, losetup created the loop12p1
device for the partition we have. It is time to set up the filesystem:
$ sudo mkfs.ext4 -b 1024 /dev/loop12p1
mke2fs 1.44.4 (18-Aug-2018)
Discarding device blocks: done
Creating filesystem with 10484716 1k blocks and 655360 inodes
Filesystem UUID: 2edfe9f2-7e90-4c35-80e2-bd2e49cad251
Superblock backups stored on blocks:
        8193, 24577, 40961, 57345, 73729, 204801, 221185, 401409, 663553,
        1024001, 1990657, 2809857, 5120001, 5971969

Allocating group tables: done
Writing inode tables: done
Creating journal (65536 blocks): done
Writing superblocks and filesystem accounting information: done
Ok, finally we can mount our device and extract the image to it:
$ mkdir mnt
$ sudo mount /dev/loop12p1 mnt/
$ sudo tar -xzf image.tar.gz -C mnt/
The last step is to install the bootloader. As we are running an Ubuntu image, we will use grub2 for that.
Firstly we need to install grub in the boot sector:
$ sudo grub-install --boot-directory mnt/boot/ /dev/loop12
Installing for i386-pc platform.
Installation finished. No error reported.
Notice we point to the boot directory of our image. Next, we have to
generate the grub.cfg file:
$ cd mnt/
$ for i in /proc /dev /sys; do sudo mount -B $i .$i; done
$ sudo chroot .
# cd /etc/grub.d/
# chmod -x 30_os-prober
# update-grub
Generating grub configuration file ...
Warning: Setting GRUB_TIMEOUT to a non-zero value when GRUB_HIDDEN_TIMEOUT is set is no longer supported.
Found linux image: /boot/vmlinuz-3.13.0-123-generic
Found initrd image: /boot/initrd.img-3.13.0-123-generic
done
We bind mount the /dev, /proc and /sys host mount points inside the Ubuntu image,
then chroot into it. Next, to avoid grub creating entries for our host OSes, we disable the
30_os-prober script. Finally we run update-grub and it creates the /boot/grub/grub.cfg file.
Now the only thing left is cleanup:
# exit
$ for i in dev/ sys/ proc/; do sudo umount $i; done
$ cd ..
$ sudo umount mnt/
The commands are self explanatory. Now let’s run our image:
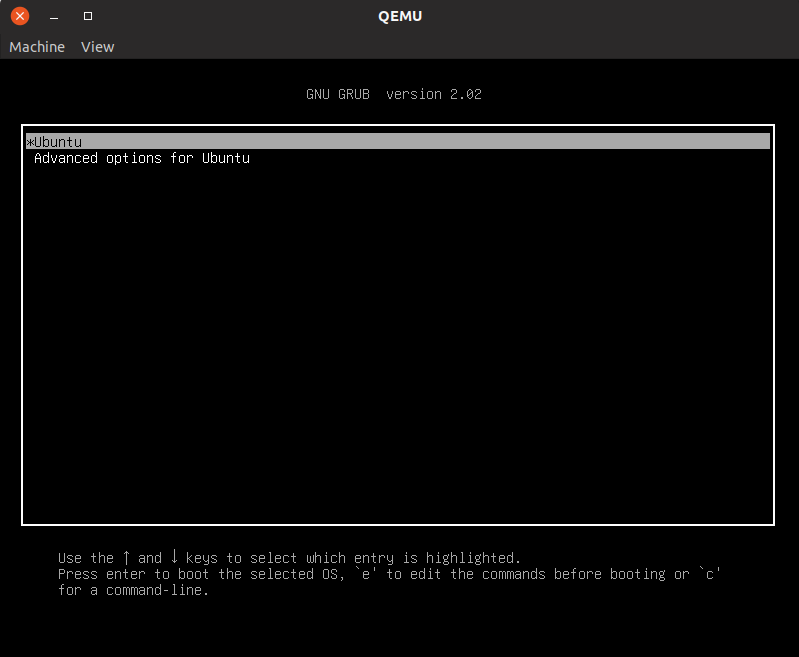
$ sudo qemu-system-x86_64 -enable-kvm -hda /dev/loop12

And that’s it, you now can run your packet image locally!